
githubにGit接続でpush/pullするとエラーになる
githubでソース管理をしているエンジニアは非常に多いですが、コマンドラインからgitコマンドを実行して、例えばこんなエラーに遭遇したことはありませんか?
$ git pull

Password:
error: The requested URL returned error: 403 Forbidden while accessing https://〇〇〇@github.com/〇〇〇/〇〇〇.git/info/refs

fatal: HTTP request failed
とか
$ git pull
ERROR: You're using an RSA key with SHA-1, which is no longer allowed. Please use a newer client or a different key type.
Please see https://github.blog/2021-09-01-improving-git-protocol-security-github/ for more information.

fatal: The remote end hung up unexpectedly
などセキュリティ強化のため続けざまに仕様が変更され、様々なエラーが出るようになってきてます。
Githubへの接続が403エラーになる原因
単純にパスワードなどのアカウント認証情報が間違っているなどの場合も以前はこのエラーが出ました。
「error: The requested URL returned error: 403 Forbidden while accessing https://〇〇〇」
しかし、パスワードはあっているのに現在エラーが出るようなら、Github自体の仕様変更が原因かもしれません。
セキュリティの仕様変更① パスワードアクセスの廃止
Githubの公式サイトより「Git操作のトークン認証要件」
https://github.blog/2020-12-15-token-authenti…
一言でいうと、「2021年8月13日以降、GitHub.comでGit操作を認証する際にアカウントパスワードを受け付けなくなります」ということです。
セキュリティの仕様変更② gitプロトコル廃止とSSHの要件変更
もう1つは
GitHubでのGitプロトコルセキュリティの改善
https://github.blog/2021-09-01-improving-git-…
こちらの概要は
※gitプロトコル廃止
※2021/11~ SSH用のECDSAおよびEd25519ホストキーが使用可能に。
※2022/3 DSAキー廃止、SHA-1署名のRSAキー廃止、SHA-2のみ利用可能に。
こちらも同様に対応していく必要があります。
ではどうしたらよいのでしょうか?
その対応方法を2つ紹介します!
Githubの仕様変更の対処方法
①SSH接続の認証に変更する
SSH接続を使える場合は、こちらで設定したほうが便利です。
Gitのバージョンが1.7.10未満の場合もこちらを選んだ方がよいです。
SSH接続の認証に切り替えるには以下の3ステップが必要です。
- ステップ① SSHの秘密鍵・公開鍵を作成
- ステップ② Githubに公開鍵を登録
- ステップ③ GitをSSH接続に設定
ステップ① SSHの秘密鍵・公開鍵を作成
$ cd ~/.ssh×ダメ(旧) $ ssh-keygen -t rsa -b 4096 -C “****@sample.com”
〇正解(新) $ ssh-keygen -t ecdsa -b 521 -C “****@sample.com”
いくつか質問されますが、パスフレーズ以外はEnterでスキップでかまいません。
パスフレーズを求められるので入力しましょう。
パスフレーズはこの鍵を認証するためのパスワードの呼び名です。
これからはパスワードでなくこのパスフレーズを使います。
空でも設定できますが、なるべくやめておいたほうがよいでしょう。
$ ls
 id_ecdsa  id_ecdsa.pub
ファイルが2つできました。
id_ecdsa.pub が公開鍵です。
id_ecdsa は秘密鍵なのでこれは絶対に他人に渡してはいけません。
自分だけで保存しておいてください。
ステップ② Githubに公開鍵を登録
https://github.com/にログイン
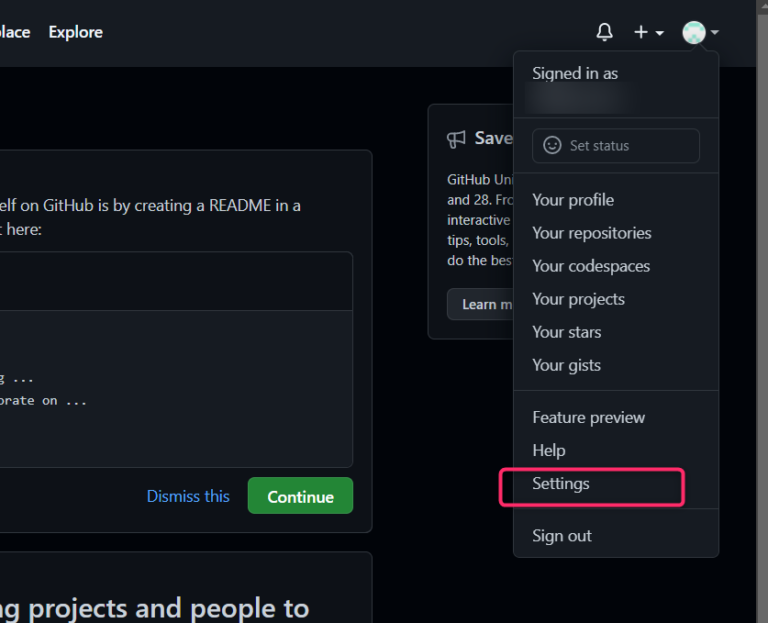
プロフィールアイコンから「Settings」
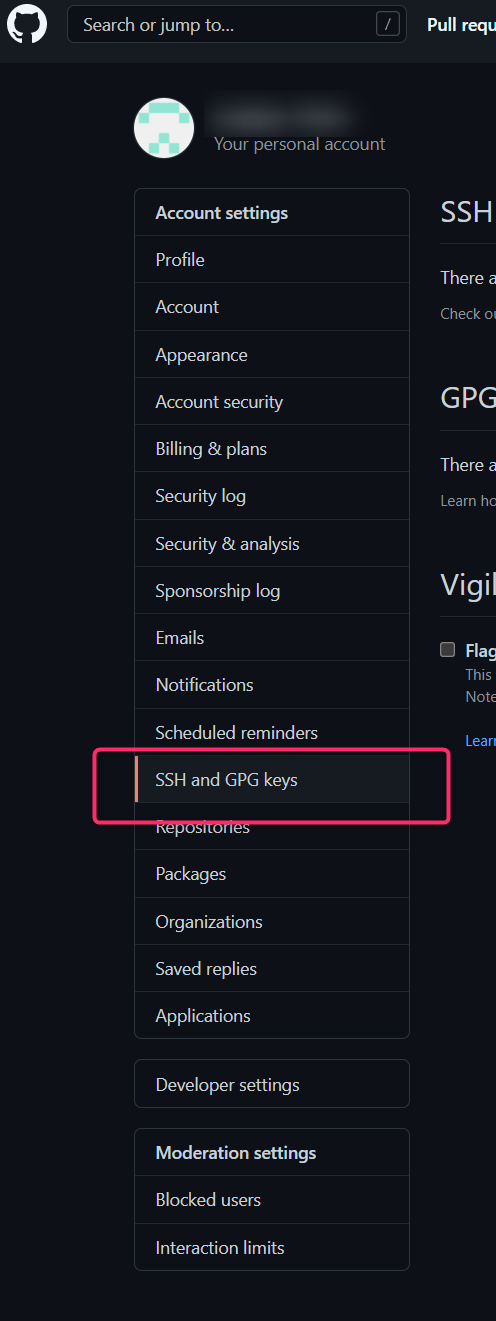
左メニューから「SSH and GPG Keys」
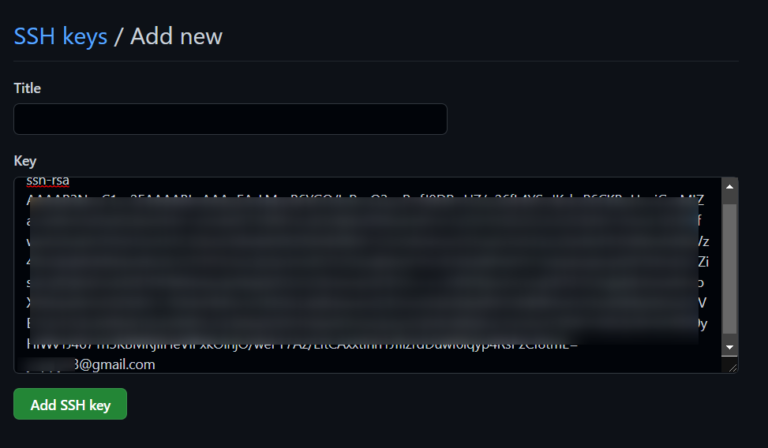
「New SSH key」ボタン

Titleは何でもいいので、Keyに先ほどのid_ecdsa.pubファイルの内容(暗号化された文字列)を貼り付けます。
これで登録は完了です。
※古いキーが登録されている場合は削除しましょう
ステップ③ GitをSSH接続に設定
キーの登録が成功してるかどうかSSH接続を確認します。
$ ssh -T git@github.com

The authenticity of host 'github.com (52.69.186.44)' can't be established.
RSA key fingerprint is

Are you sure you want to continue connecting (yes/no)? yes    ←yes
Warning: Permanently added 'github.com,52.69.186.44' (RSA) to the list of known hosts.

Enter passphrase for key '/home/****/.ssh/id_ecdsa':     ←パスフレーズを入力

Hi *******! You've successfully authenticated, but GitHub does not provide shell access. ←これが出れば成功
また、これまでの設定からSSH用の設定に変更します。
git remote set-url origin git@github.com:<Gitユーザー名>/<リポジトリ名>.git設定確認
git remote -vこれで設定は完了です。
実際にpullしてみましょう。
$ git pull
Enter passphrase for key '/home/****/.ssh/id_ecdsa':    ← パスフレーズを入力
Already up-to-date.
成功!!
これまでのパスワード入力となんら変わらない操作で接続できました。
おまけ
コマンドラインだけではなくGUIのクライアントgitアプリケーションをつかっている場合もあると思うので、その場合はそちらも変更しておきましょう
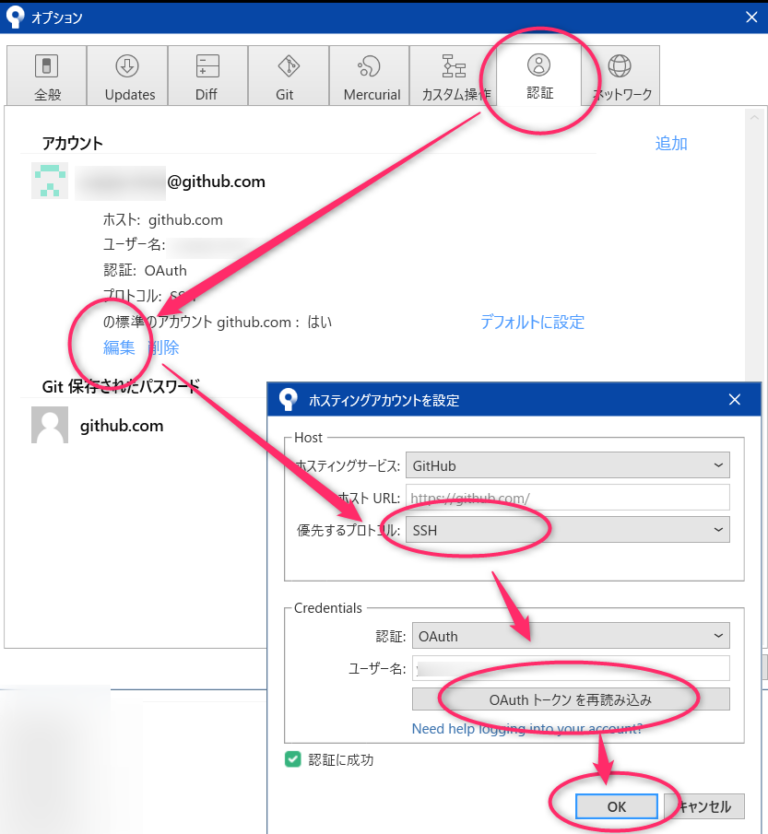
Sourcetreeの場合
メニュー>ツール>オプション
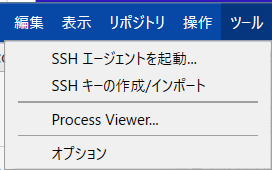
以下のように選択して、今回使ったSSHで更新します。
②トークンを使った認証方式に変更する
トークンを使う方法を紹介します。
コマンドラインのGitバージョン1.7.10未満の場合は対応していません。
https://github.com/にログイン
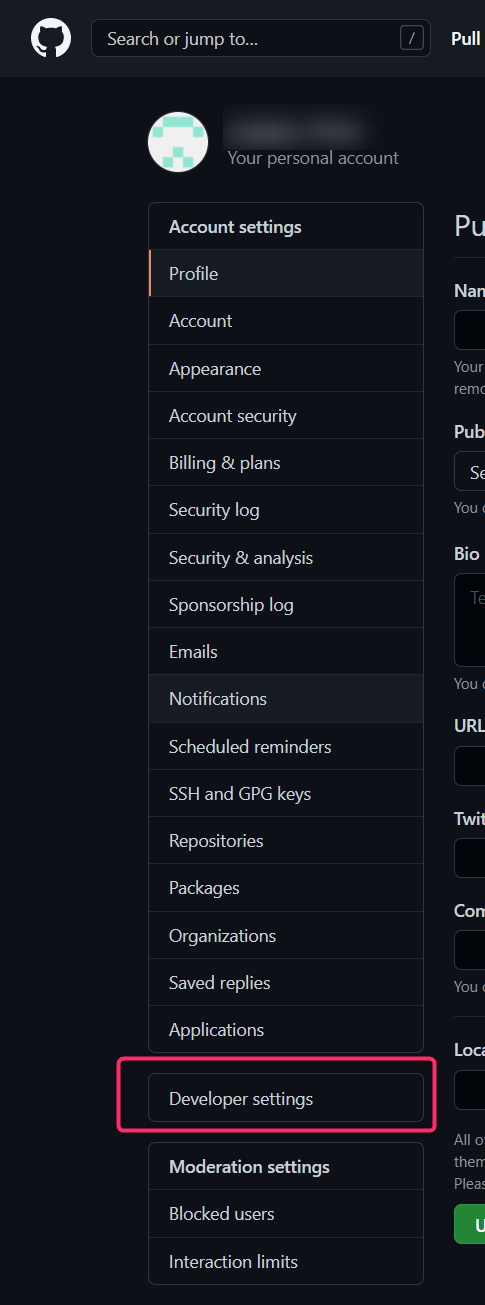
プロフィールアイコンから「Settings」

左メニューの「Developer Settings」
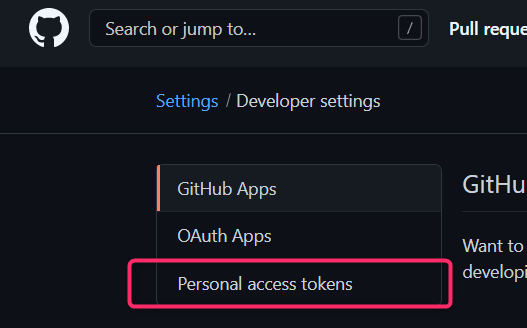
左メニューの「Personal access tokens」
右上の「Generate new token」

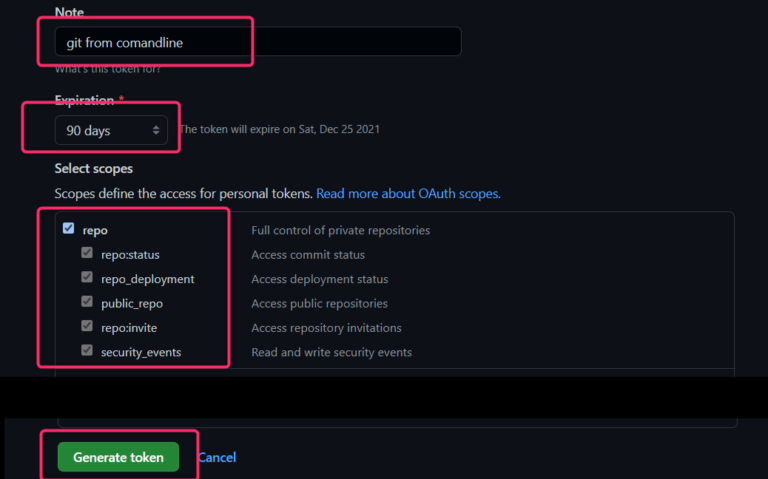
トークンを新規作成します。
Note→トークン名などを好きな文字列を入力。
Expiration→トークンの期限を入力。期限なしもあり。
Select scopes→権限。コマンドラインから使いたい時はrepoを。
アクセストークン文字列が出来ました。
こちらをコピーします。
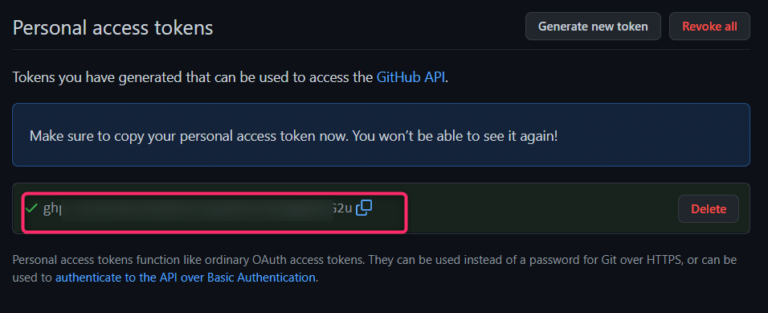
これで普通にパスワード代わりにアクセストークンを入力することでアクセスできるようになります。
その他の設定を変える必要はありません。
毎回、保存するのが面倒な場合は、以下のようにすることでトークンをキャッシュし入力せずにアクセスすることができます。
※注) git 1.7.10以上が必要
#1時間(3600秒)の場合

$ git config --global credential.helper 'cache --timeout=3600'

コメント